6.2 KiB
<<<<<<< HEAD
Dynatrace Reporting Pipeline
This repository is used as a template to create automated Dynatrace reports through Jenkins (JAWS) which are sent as attachement through mail.
Jenkins environments
EMEA & NA: https://jaws.bmwgroup.net/opapm/
CN: https://jaws-china.bmwgroup.net/opmaas/
Request access
Access is granted manually through stephan.oertelt@bmw.de and Mohammed.Abadel@bmw.de
Multi-Branch Pipelines
- master (=latest) --> for testing and developing stuff
- staging --> pre-release branch, if stuff tested successfully here merge it to production
- production --> actively used, productive reports
Minimum Content of a Dynatrace Reporting Repo
Repository & Pipeline Naming
- Repository and Pipelines must have identical names
- Naming must start with CoCo_APM_Reporting_report name here
readme-File
The readme file must contain a useful description what is reported when to whom
Example:
This report is reporting all installed OneAgent versions including:
- Hostnames
- Environment Tag
- PaaS Tag
Sent to: coco-apm@bmw.de
Executed on each Monday of every week
Executed on every Dynatrace environment
requirements.txt
The requirements.txt file must contain all python packages which are used within the script through import
e.g.:
pyyaml
pandas
decouple
requests
datetime
argparse
environments.yaml
The environments.yaml contains all environments on which the script should be executed, environments which should not be executed may be excluded through #
Do NOT change the environments names, the pipeline script is configured to distingue between EMEA/NA and CN as their are different Jenkins environments!
The following snipped shows an environment file, which is only executed on Dynatrace prod environments.
euprod:
    - name: "euprod"
    - env-url: "https://xxu26128.live.dynatrace.com"
    - env-token-name: "EUPROD_TOKEN_VAR"
#eupreprod:
    - name: "eupreprod"
    - env-url: "https://qqk70169.live.dynatrace.com"
    - env-token-name: "EUPREPROD_TOKEN_VAR"
#napreprod:
    - name: "napreprod"
    - env-url: "https://onb44935.live.dynatrace.com"
    - env-token-name: "NAPREPROD_TOKEN_VAR"
naprod:
    - name: "naprod"
    - env-url: "https://wgv50241.live.dynatrace.com"
    - env-token-name: "NAPROD_TOKEN_VAR"
cnprod:
    - name: "cnprod"
    - env-url: "https://dynatracemgd-cn.bmwgroup.net/e/b921f1b9-c00e-4031-b9d1-f5a0d530757b"
    - env-token-name: "CNPROD_TOKEN_VAR"
#cnpreprod:
    - name: "cnpreprod"
    - env-url: "https://dynatracemgd-cn.bmwgroup.net/e/b921f1b9-c00e-4031-b9d1-f5a0d530757b"
    - env-token-name: "CNPREPROD_TOKEN_VAR"
Jenkinsfile
The Jenkinsfile is the pipeline script itself including:
- Time-Trigger
- Install package step
- Execute script step
- Send Mail step
Python Script
The script itself will gather and aggregate the data from the Dynatrace environments.
Script output must be a csv or excel file in the folder where the script is executed
First Usage - Create a new Pipeline
Fork this repo
Do NOT clone this repo, create a fork instead.
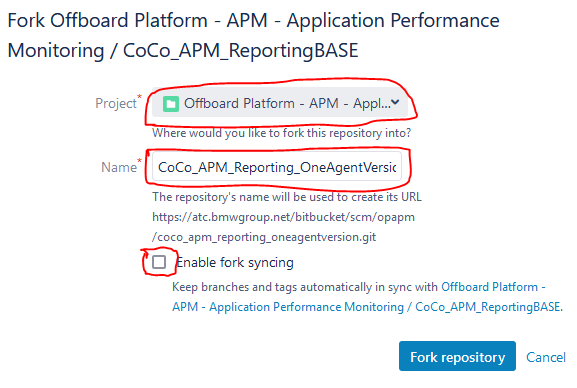
- On the left menue bar click on Create fork
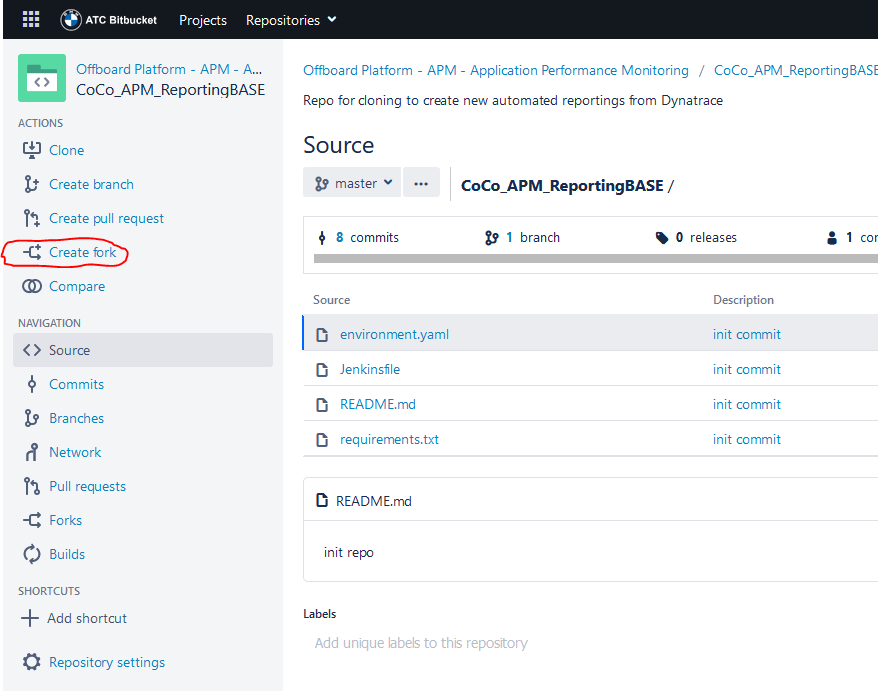
- Choose Project Offboard Platform - APM - Application Performance Monitoring
- Choose a name starting with CoCo_APM_Reporting_ and a useful suffix
- Uncheck Enable fork syncing
- Edit readme.md and describe your report
- Change/Update the environment, requirements and script according to your needs
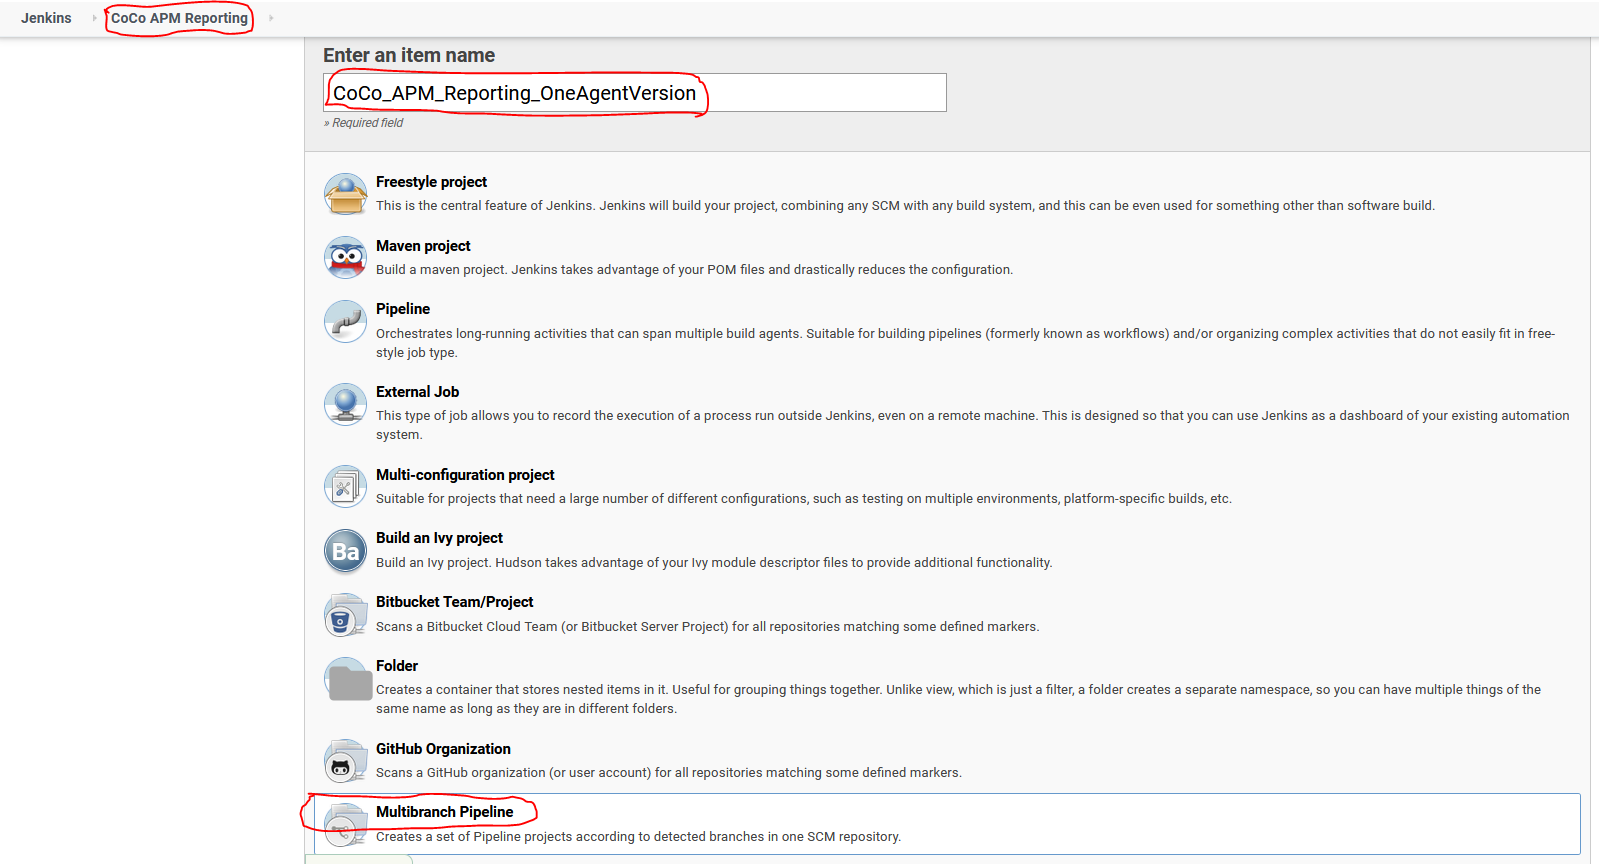
- Login to Jenkins and select the folder Coco APM Reporting
- Click the New Item Button
- Enter the name of your repo (e.g. CoCo_APM_Reporting_OneAgentVersion)
- Select Multibranch Pipeline
- Click OK Button
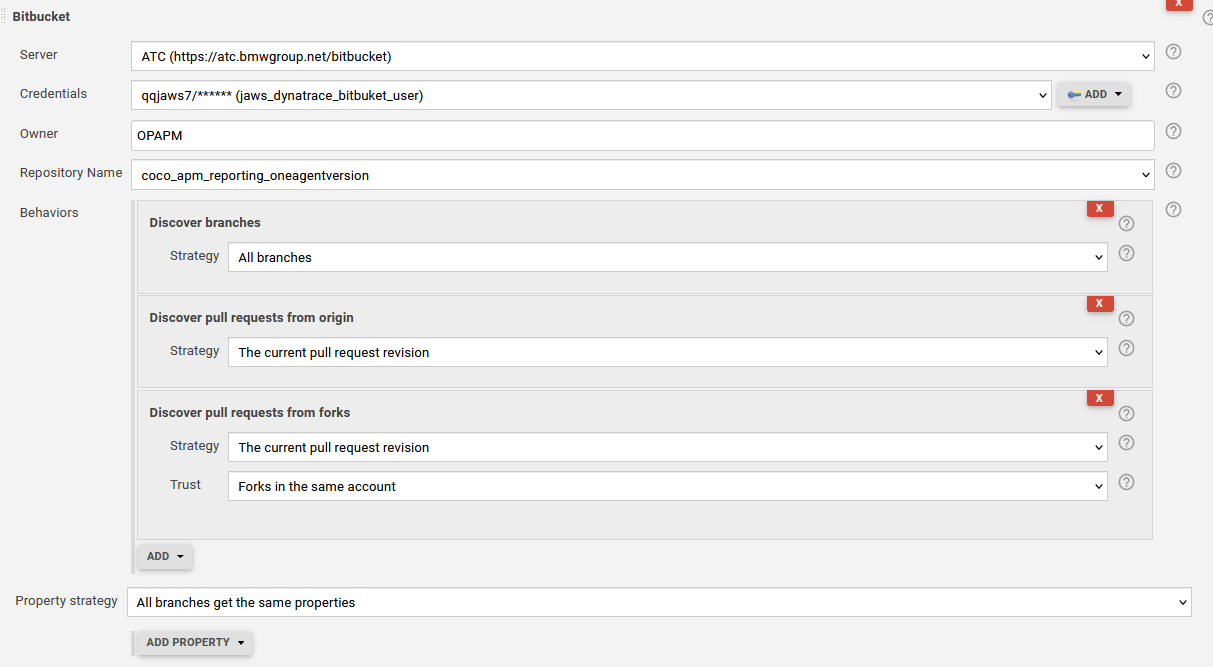
- On The Pipeline Settings go to Branch Sources, click ADD SOURCE and select Bitbucket
- Server: ATC
- Credentials: qqjaws7
- Owner: OPAPM
- Repository Name: your forked repository
- Behavious: According to screenshot
Your pipeline will automatically test-run for all 3 branches. ======= # TerraformOnboarding The purpose of the exportConfig.py script is to export dynatrace specific services as terraform files. The importConfig.py script is used to additionally also export the states for each exported terraform file, since terraform does not do that by default.
Setup
Run the following command to install all necessary dependencies:
pip install -r requirements.txt
In order to ensure full functionality a .env file is necessary with the following format:
# Environment URLs
CN_PREPROD_ENV_URL="https://dynatracemgd-cn.bmwgroup.net/e/ab88c03b-b7fc-45f0-9115-9e9ecc0ced35"
CN_PROD_ENV_URL="https://dynatracemgd-cn.bmwgroup.net/e/b921f1b9-c00e-4031-b9d1-f5a0d530757b"
EMEA_PREPROD_ENV_URL="https://qqk70169.live.dynatrace.com"
EMEA_PROD_ENV_URL="https://xxu26128.live.dynatrace.com"
NA_PREPROD_ENV_URL="https://onb44935.live.dynatrace.com"
NA_PROD_ENV_URL="https://wgv50241.live.dynatrace.com"

# Environment Tokens
CN_PREPROD_API_TOKEN="<your-token>"
CN_PROD_API_TOKEN="<your-token>"
EMEA_PREPROD_API_TOKEN="<your-token>"
EMEA_PROD_API_TOKEN="<your-token>"
NA_PREPROD_API_TOKEN="<your-token>"
NA_PROD_API_TOKEN="<your-token>"
Place the .env file within the root directory of the project folder:
TerraformDynatrace Porter # Project Folder
├─── res
├─── templates
├─── .env                 # Add the environment file
├─── .gitignore
├─── README.md
├─── exportConfig.py
├─── imortConfig.py
├─── main.tf
└─── requirements.txt
Run
You can simply run the script by executing the following example command within the projects root directory:
python exportConfig.py
python importConfig.py
Note: First run the exportConfig.py script and once that is done run the importConfig.py script.
Version
Python 3.9.9